We often need to create a document with images, and a common problem that occours is that they tend to increase the file size dramatically.
How can we optimize the document size when using images?
Note: I will use Word 2010 to show the result file size for each example, so that you can perceive the differences.
To start, there is no one rule that fits all, each scenario has its needs and you should use the technic that gives you the best results. In this post you will get the knowledge that you need to make the best choice.
Crop and Compress Pictures
I will start creating a document named “Optimizing Images in Microsoft Word 2010.docx”.
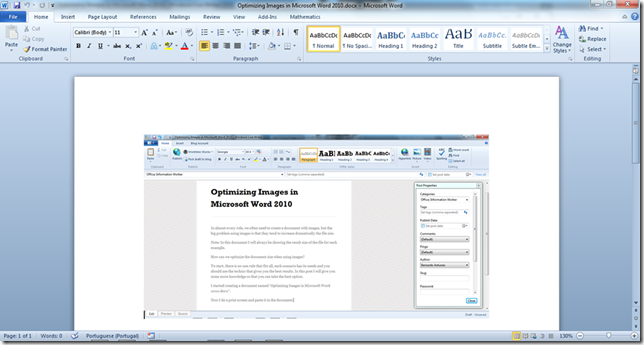
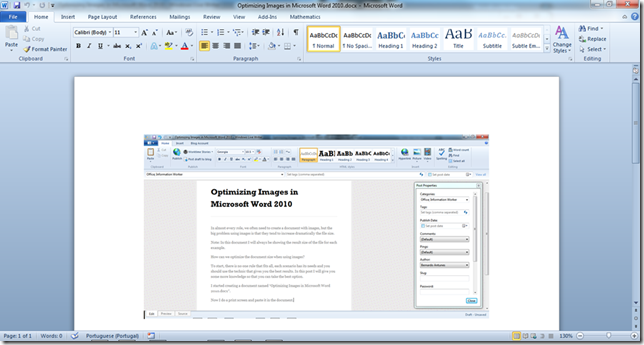
Now I do a print screen and paste it in the document.
Just doing this, the document will have a file size of 356KB. It is not much, but normally we have dozens of images in one document.
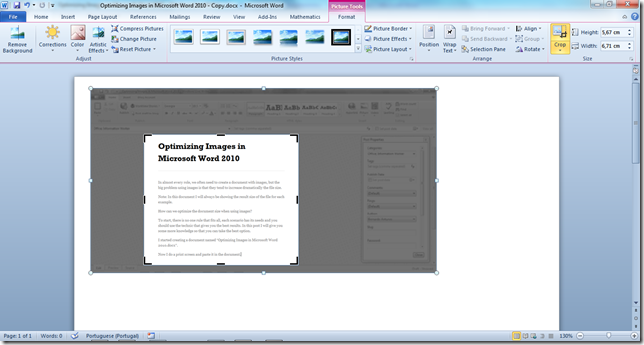
Now I will Crop the image using Work Crop options.
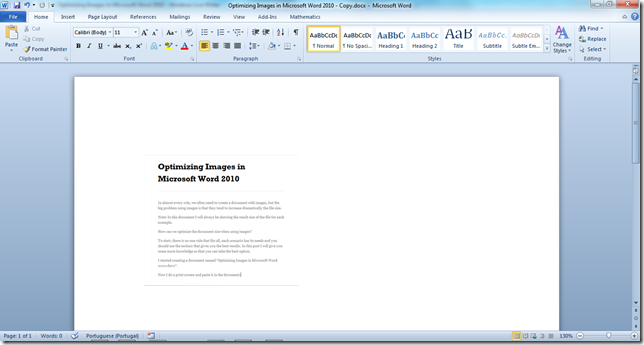
I will get the result I want as you can see below…
…but the file size didn’t decrease, it has kept its original 356KB file size even with this much smaller image.
Is this a problem in Word 2010? The answer is No, this is how Word works, because if we would select the image and go to the Crop option again, we are able to change the crop area whenever we want, it is allowing to correct any detail anytime. This functionality is very handy, but Word has to store the full original image in the document. This is why we did not see any change in file size.
When you are sure that you cropped the right area and want to reduce the file size you can go and compress the pictures.
To do that you have to select the image, then Picture Tools –> Format and select the Compress Pictures in the Adjust Group.
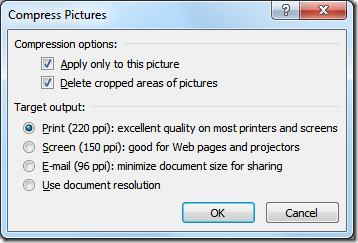
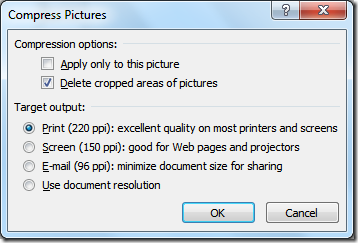
You be prompted with this options:
Depending on your scenario, you select different options, but for our demonstration, I will select the options above.
By doing that, the file size reduces to 118KB, but remember that you will not be able to recover any of the cropped area after this, so you better have the original.
Can we say that we should always select the option “Delete cropped areas of pictures” to decrease the file size? Again the answer is No, it depends on what you are doing, I will exemplify.
Multiple references to the same image
Suppose that we would like to create the user manual for an application, so we need to explain the main interface and all the different options that are available.
We create a new document and paste the same image, returning to the 356KB file.
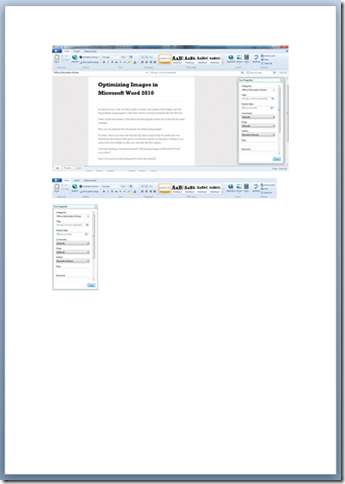
Now, we want to explain the different areas in the interface, so we copy paste the original image two times and crop to the following zones:
Area 1 – The Ribbon
Area 2 - Post Properties Window
And we get with a document looking like this:
After saving the document has a file size of 357KB, we have now 2 more images being displayed in the document and the increase in the file size was 1KB.
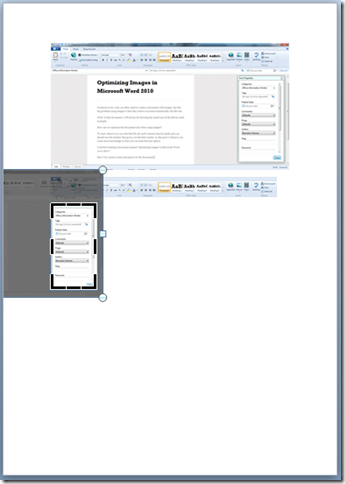
And the best thing is that we still have the option to adjust any of the cropping setting of the images. As we see below.
Now we are ready to see why we should not always select the option “Delete cropped areas of pictures”.
We will now again select the Picture Tools –> Format and select the Compress Pictures in the Adjust Group.
But this time we will unselect the the option “Apply only to this picture”, this way the command will be applied to all the images in the document, make sure that the option “Delete cropped areas of pictures” is selected.
After doing this and saving, the document file size is now 468KB, a lot bigger.
This happens because the images loose the reference between each other and internally, now we have 3 distinct images.
Inserting an external image
By default, each time that we paste an image into a Word 2010 document, the image is internally stored as an PNG format, in this example the image alone occupies 343KB. If instead of just pasting the print screen, we save it in a Image Editor program, and saving it in JPG with a quality settings of 50 (low image quality but higher compression), we will get a image file size of 95KB.
Now we go to Insert –> Picture and select the image that we created and save. The document will be now 108KB, that is really small.
Now we can do the same, copy&paste creating different references over this small image and the file size remains really small.
Once again, if we go to Compress Picture and “Delete cropped areas of pictures”, we will get a bigger document, even if you only have one image. This happens if the image if cropped, Word will have to internally create a new image, and it will internally save the new image in its default format, PNG.
Conclusion
It is easy to have a very nice document with an acceptable file size, but we must know how the tool works. Because, even an option called “Compress Pictures” can make the document bigger, and Copy&Pasting the same image several times in the same document can make a smaller document.
